
Installing Minecraft Fabric mods with the MultiMC launcher
Warning! MultiMC has been forked a few times due to various reasons, now you should use https://prismlauncher.org/
About MultiMC
First of all: what is MultiMC?
It's an alternative launcher which allows you to have multiple, separated instances of Minecraft. Each instance can have their own mods, resource packs, saves, etc.
These can easily be managed via the powerful interface. You can also export an instance (as a zip) and re-import it later. You can use these as backups or even as custom modpacks to send to your friends.
It's a cross-platform launcher, so it works on Windows, MacOS and Linux.
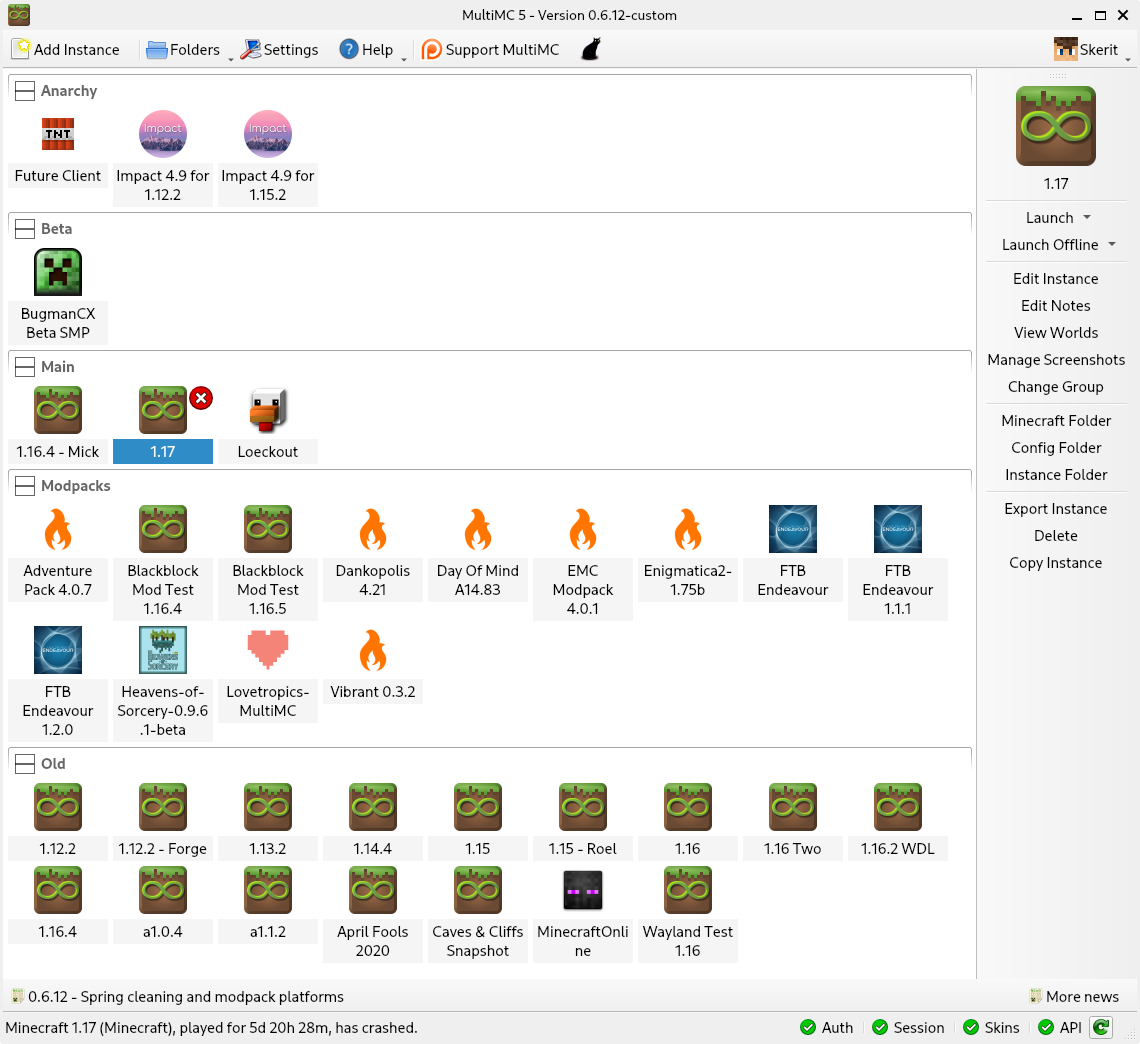
This is what my installation looks like. It's a bit of a mess, but it's easy to put things in groups and then minimize those groups you don't really want to see.
Note: this isn't an expansive tutorial about each feature of MultiMC, it's just a guide to get you started & to install mods.
Installing Java
The default Minecraft launcher comes bundled with Java, but MultiMC does not. So first we will have to install that.
Go to https://adoptopenjdk.net/ and download the latest release.
You'll see something like this on the homepage:
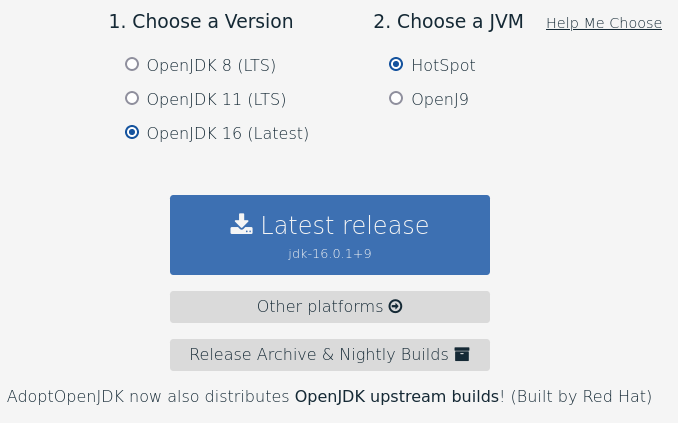
As of this writing (10th of July 2021) it will have auto-selected OpenJDK 11. This is not what we want. Minecraft 1.17 requires at least version 16, so select that and click on the "Latest release" download button.
Warning: version 16 is not an LTS (or Long-Term-Support) version, so Minecraft 1.18 will probably require a higher version once it comes out. You can install multiple versions of Java on your system without problems though, and each Minecraft instance in MultiMC can be assigned a different version to use.
Now you just have to execute the Java installer (the file you just downloaded) and follow the wizard. The default options should be fine!
Installing MultiMC
Go to the MultiMC website and scroll down to the download section:
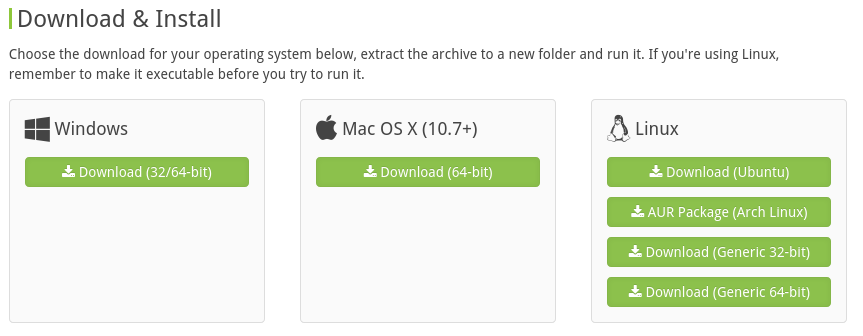
Click the download button for your platform. This guide is only for Windows though.
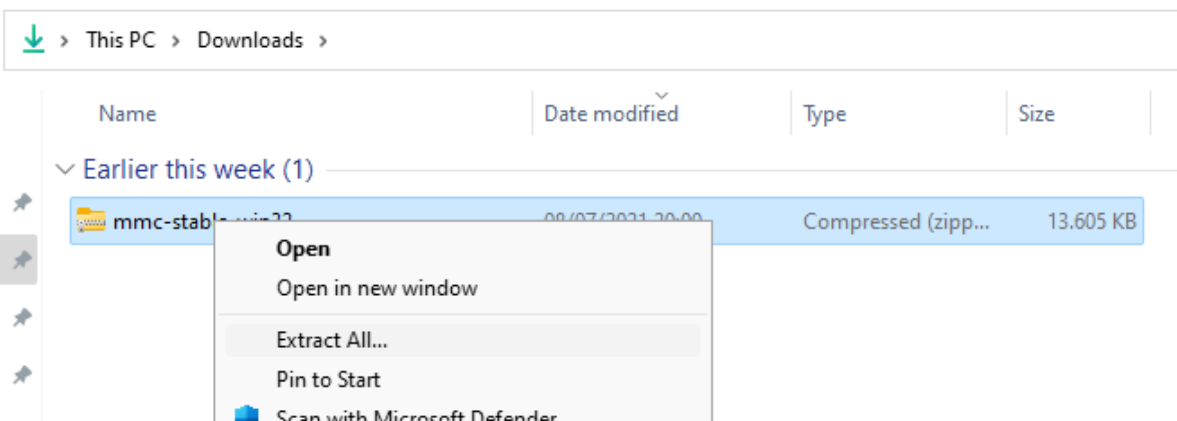
MultiMC actually does not have a custom installer for Windows, it's just a zip file. So now you should have a zip file called mmc-stable-win32 in your downloads folder.
Go to it, right click it and select Extract all.... (It is important to extract it before copying the contents, because otherwise certain file permissions are set wrong.)
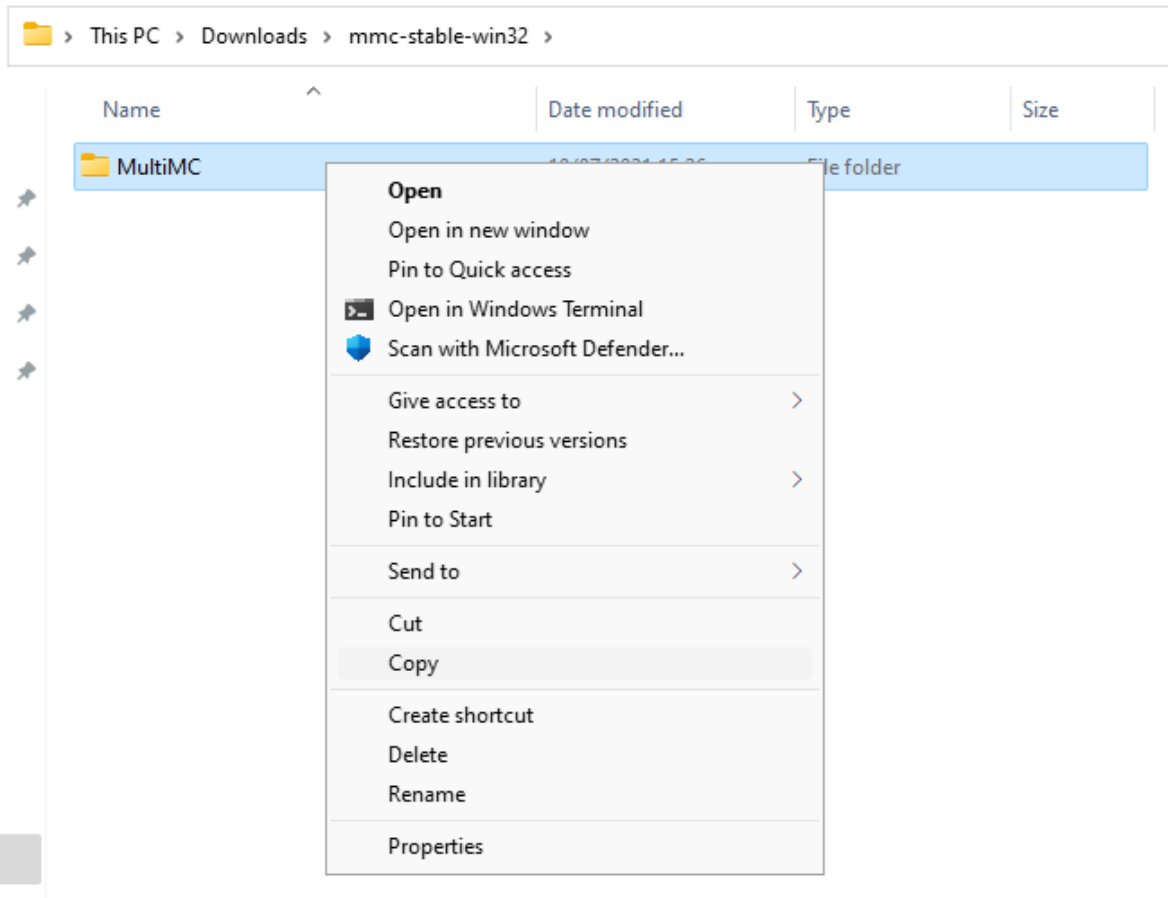
After extracting the zip, we should have a new folder with the same name next to the zip. Open it (make sure you're opening the folder and not the zip, because zip files behave a lot like folders on Windows), and copy the MultiMC folder inside of it:
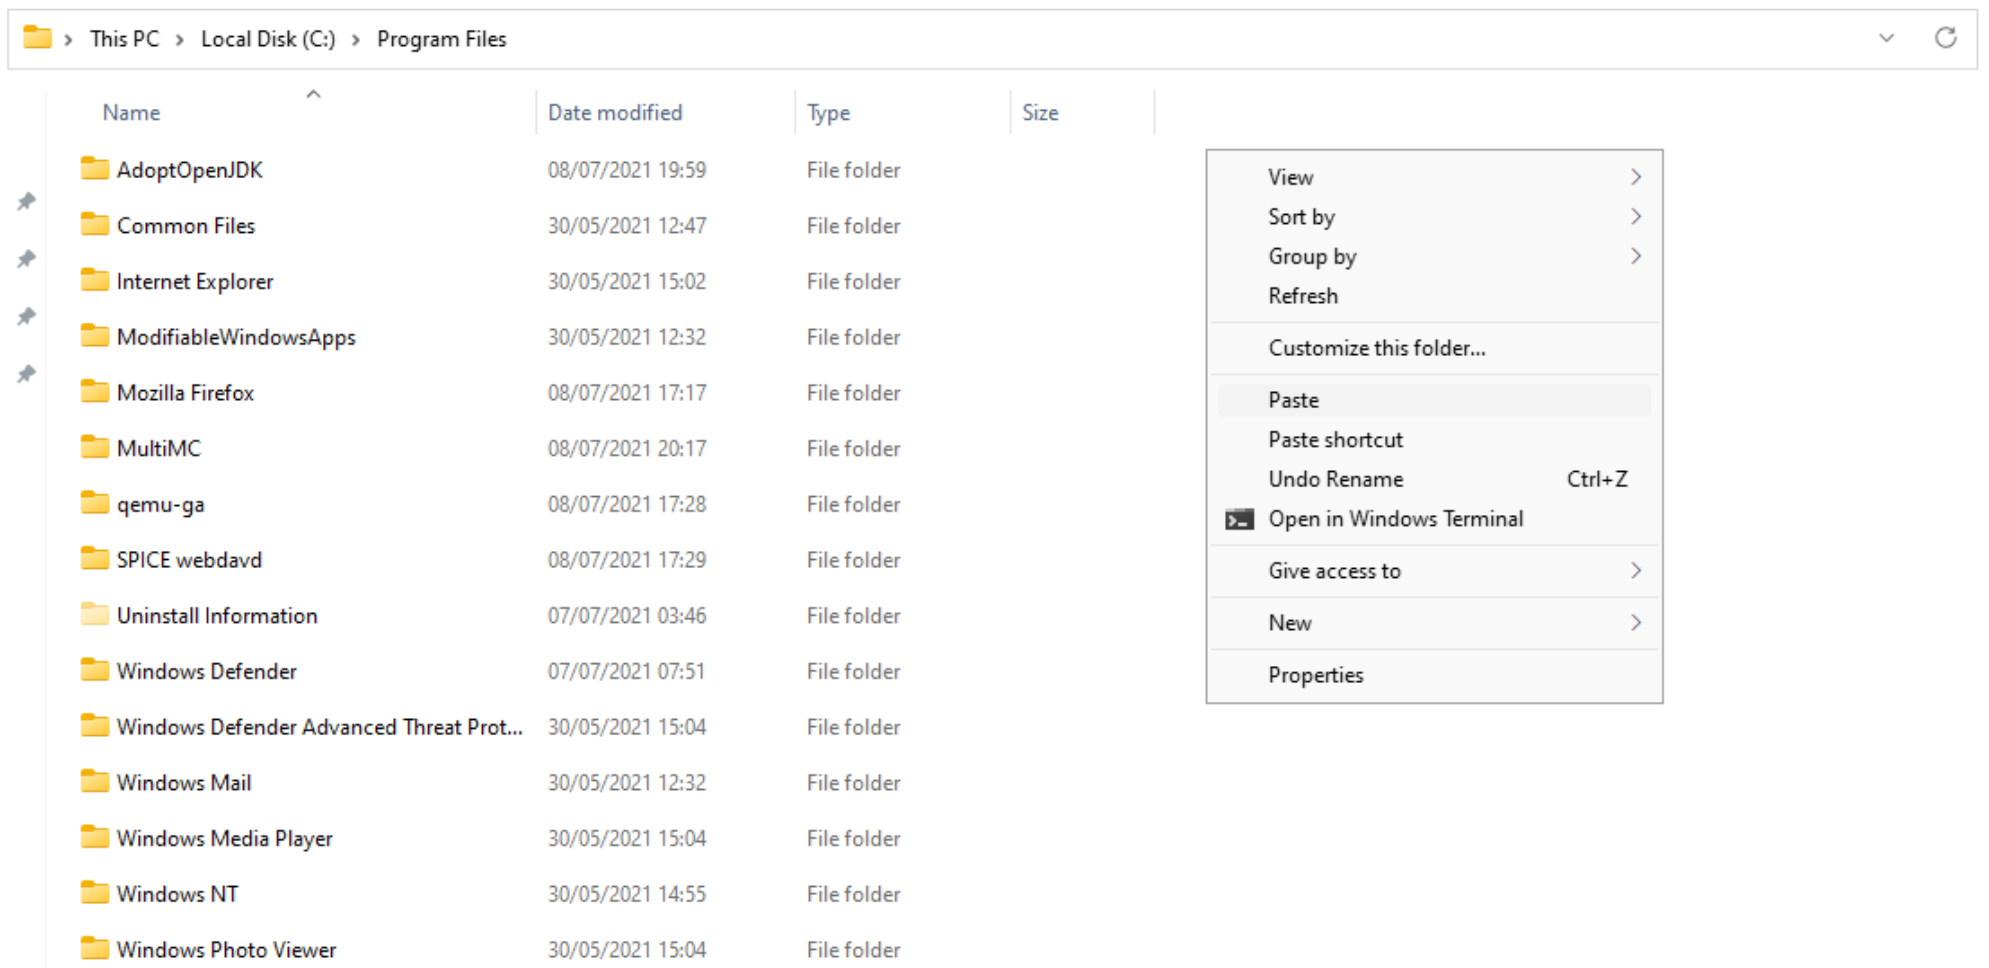
Now that we have done that, it's time to paste this folder somewhere permanent. You can do this wherever you prefer, I chose to put it in the C:\Program Files\ folder:
Now that you've pasted the MultiMC folder somewhere, you need to open it!
There are lots of files inside the folder you just pasted, but we need the MultiMC application itself. It'll have a distinct icon too:
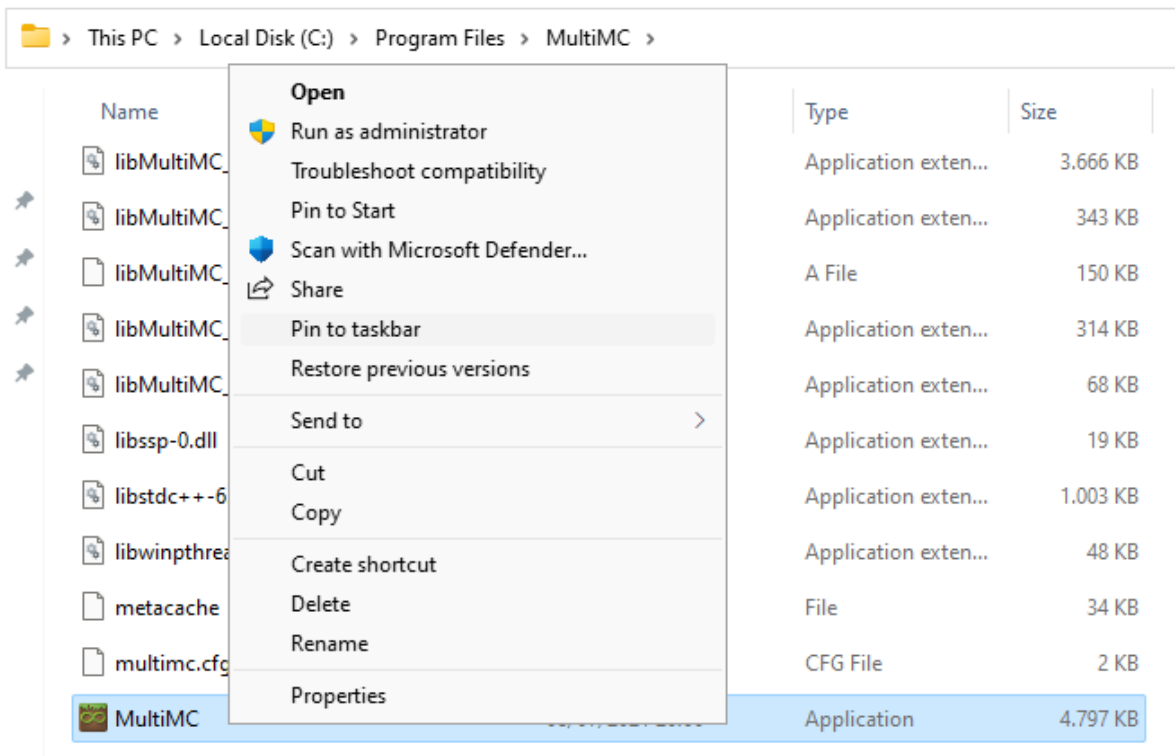
Select the file, right click it, and choose Pin to taskbar and/or Pin to Start so you can easily start the application from the taskbar or the start menu.
Setting up MultiMC for the first time
Now it's time to start MultiMC, and on the first start it will greet you with a small configuration wizard:
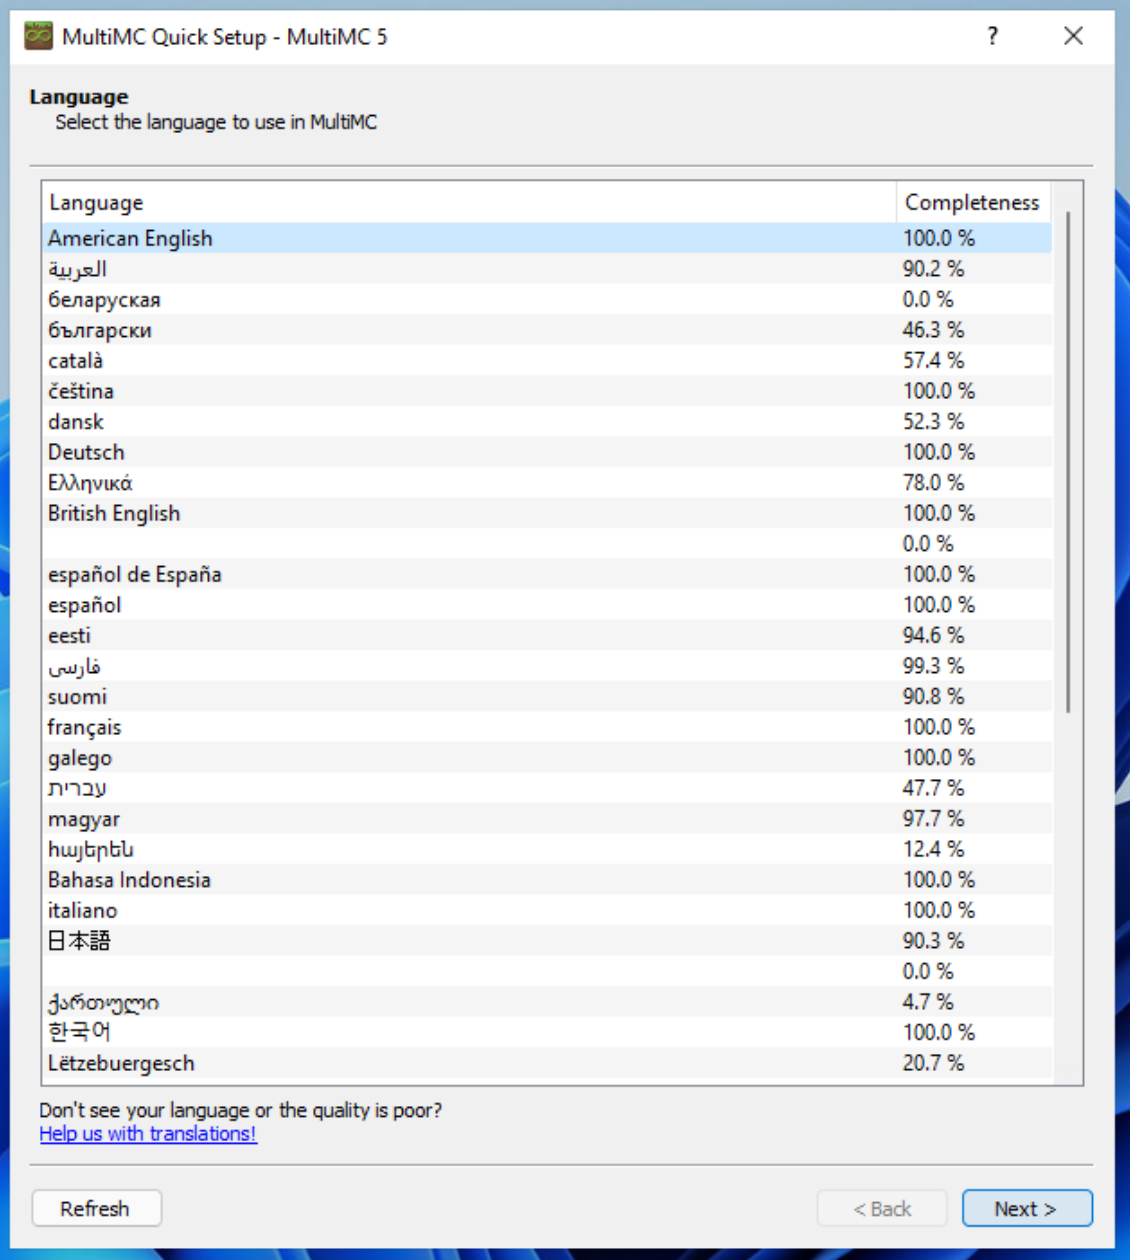
The first screen is the interface language selection (this does not affect the default Minecraft language, that is always in English).
The second screen is important: the Java version selection & memory configuration:
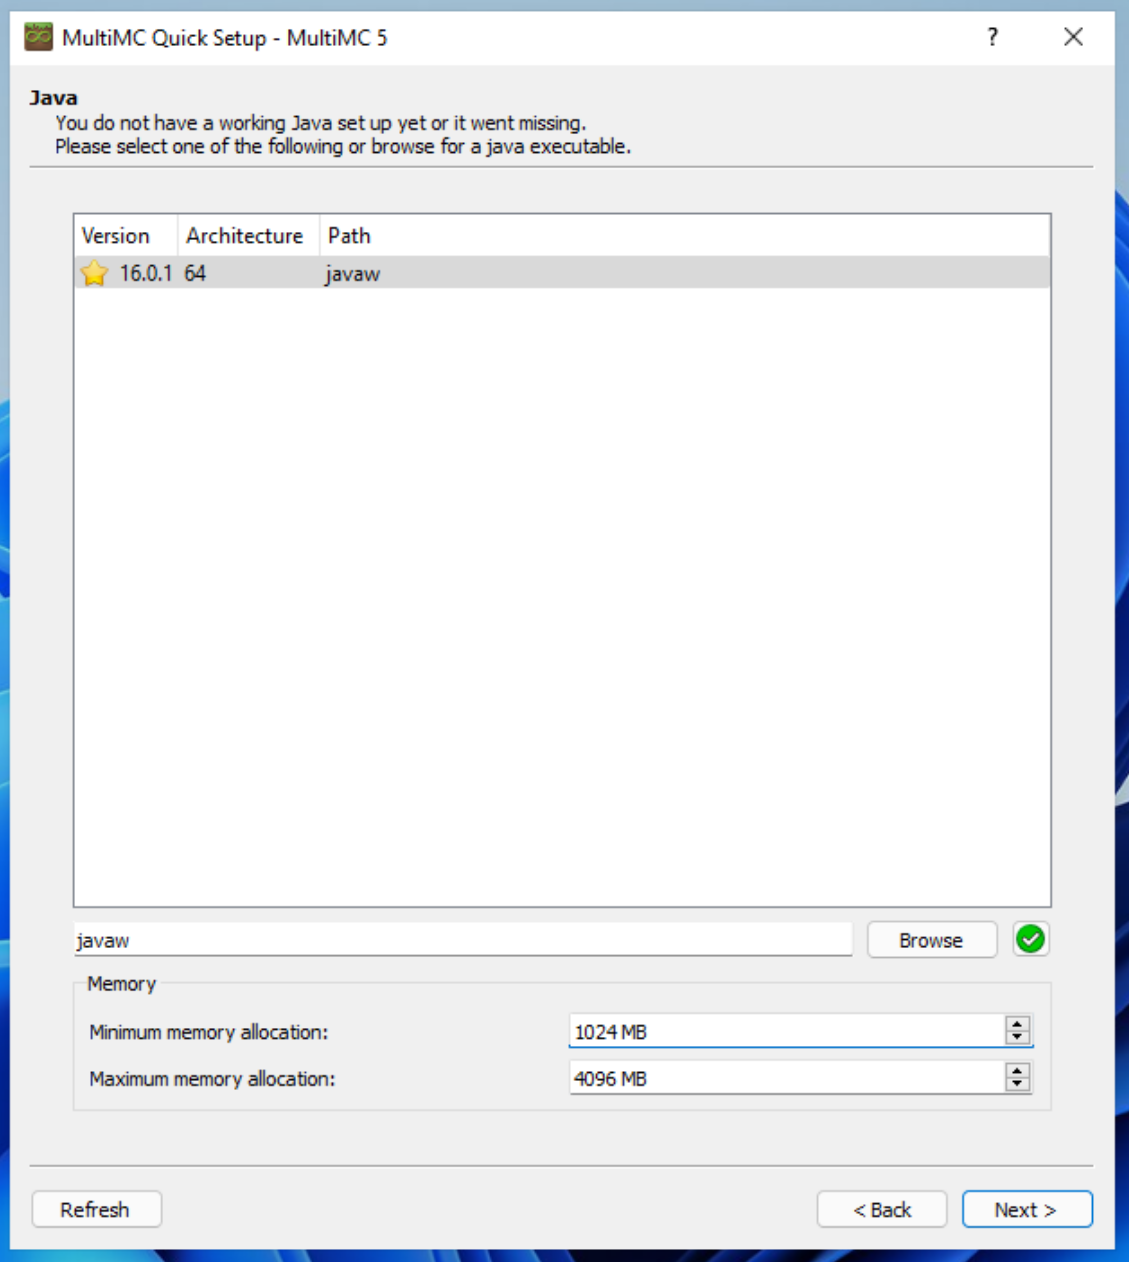
If you installed the OpenJDK Java file correctly, it should now show up in this list. Make sure the correct version is selected (so right now, just after version 1.17 got released, it should be version 16)
Under the version selection you see 2 text inputs regarding memory usage.
By default it's set at 512 & 1024 megabytes. I think that's a bit low, especially when mods are involved.
I suggest to set the max memory usage to 4096 (that's 4 gigabytes of RAM) and the minimum to 1024 (that's 1 gigabyte of ram).
It's also best to set them in that order: max memory allocation first, min memory allocation last. This is because the 2 inputs are linked, and the min memory usage can't be higher than the max. So when you modify the maximum memory allocation, the minimum memory allocation gets borked.
Warning: Make sure you actually have enough memory available. If you only have 4 gigabytes of ram to begin with... well first of all: how do you manage? Second of all: lower the max by a thousand so the operating system has enough to work with.
Click the Next button to go to the next page.
This page is the Analytics page. By default, MultiMC will gather some anonymized usage data and send it back to their server. If you don't like this, you can just untick the checkbox.
That was it! Just click the Finish button and the application wil finally start.
Logging in
Now that MultiMC is set up, let's configure your account.
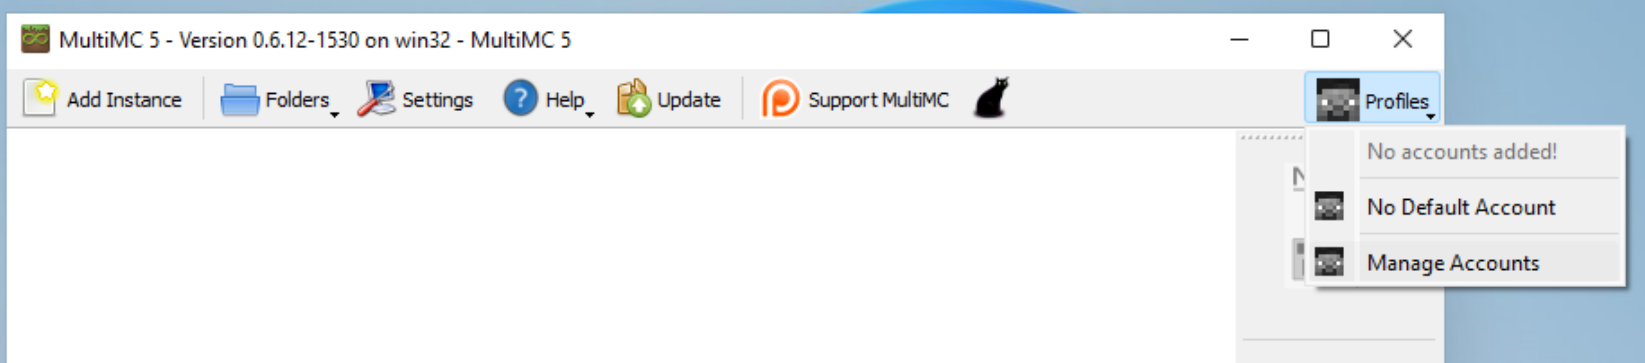
On the top right of the MultiMC window you'll see a button called Profiles, click it and select Manage accounts:
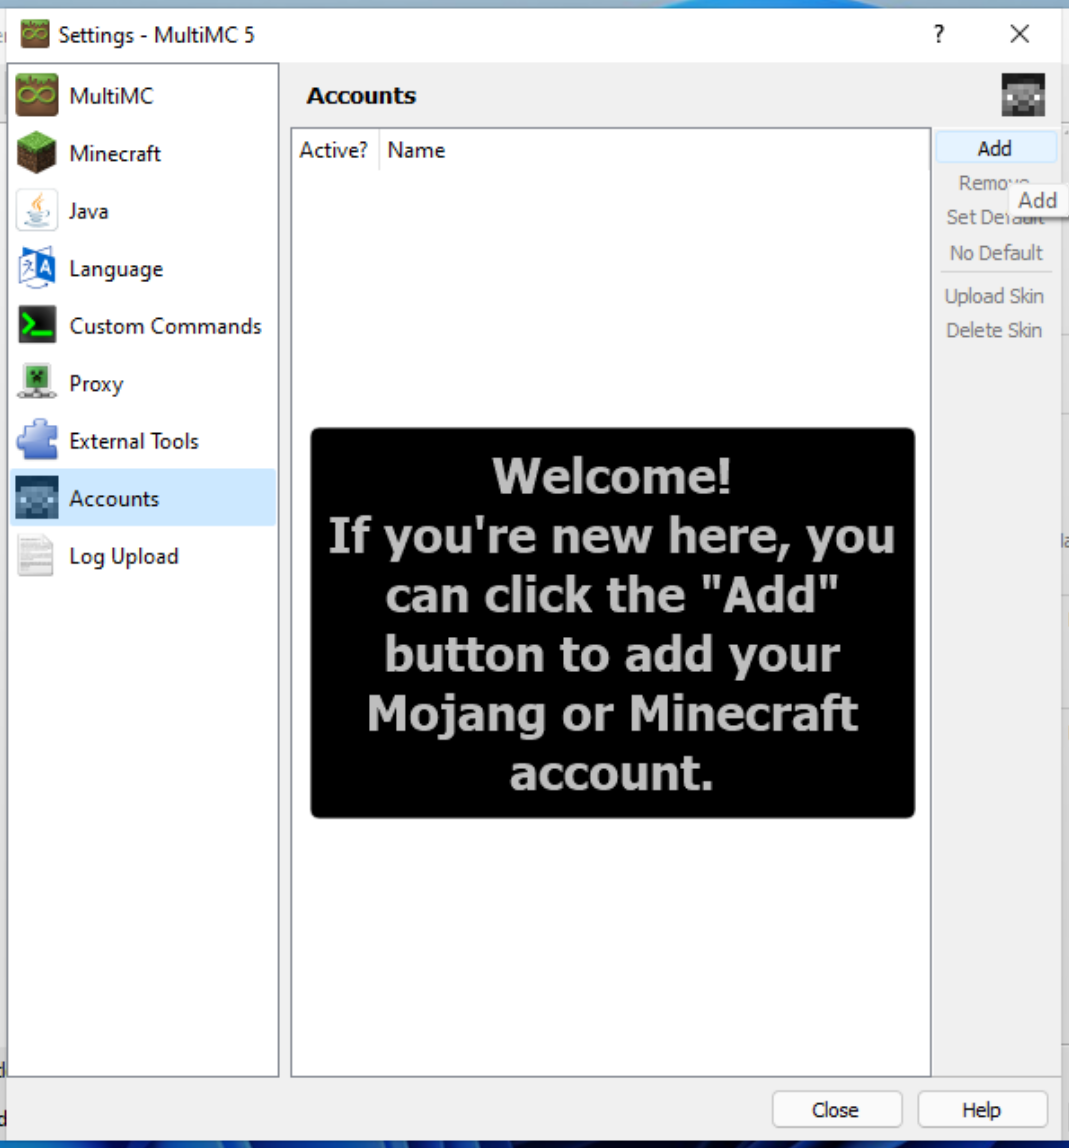
A new window will open, there you should click on the Add button:
A new, small window will pop up where you can enter your account's e-mail address and your password.
Click Ok!
Warning! Minecraft will switch to using Microsoft accounts in the future, this step will probably look quite different then.
Adding your first instance
After succesfully logging in, go back to the main window. On the top left you'll see a button Add Instance, click it and you'll get this window:
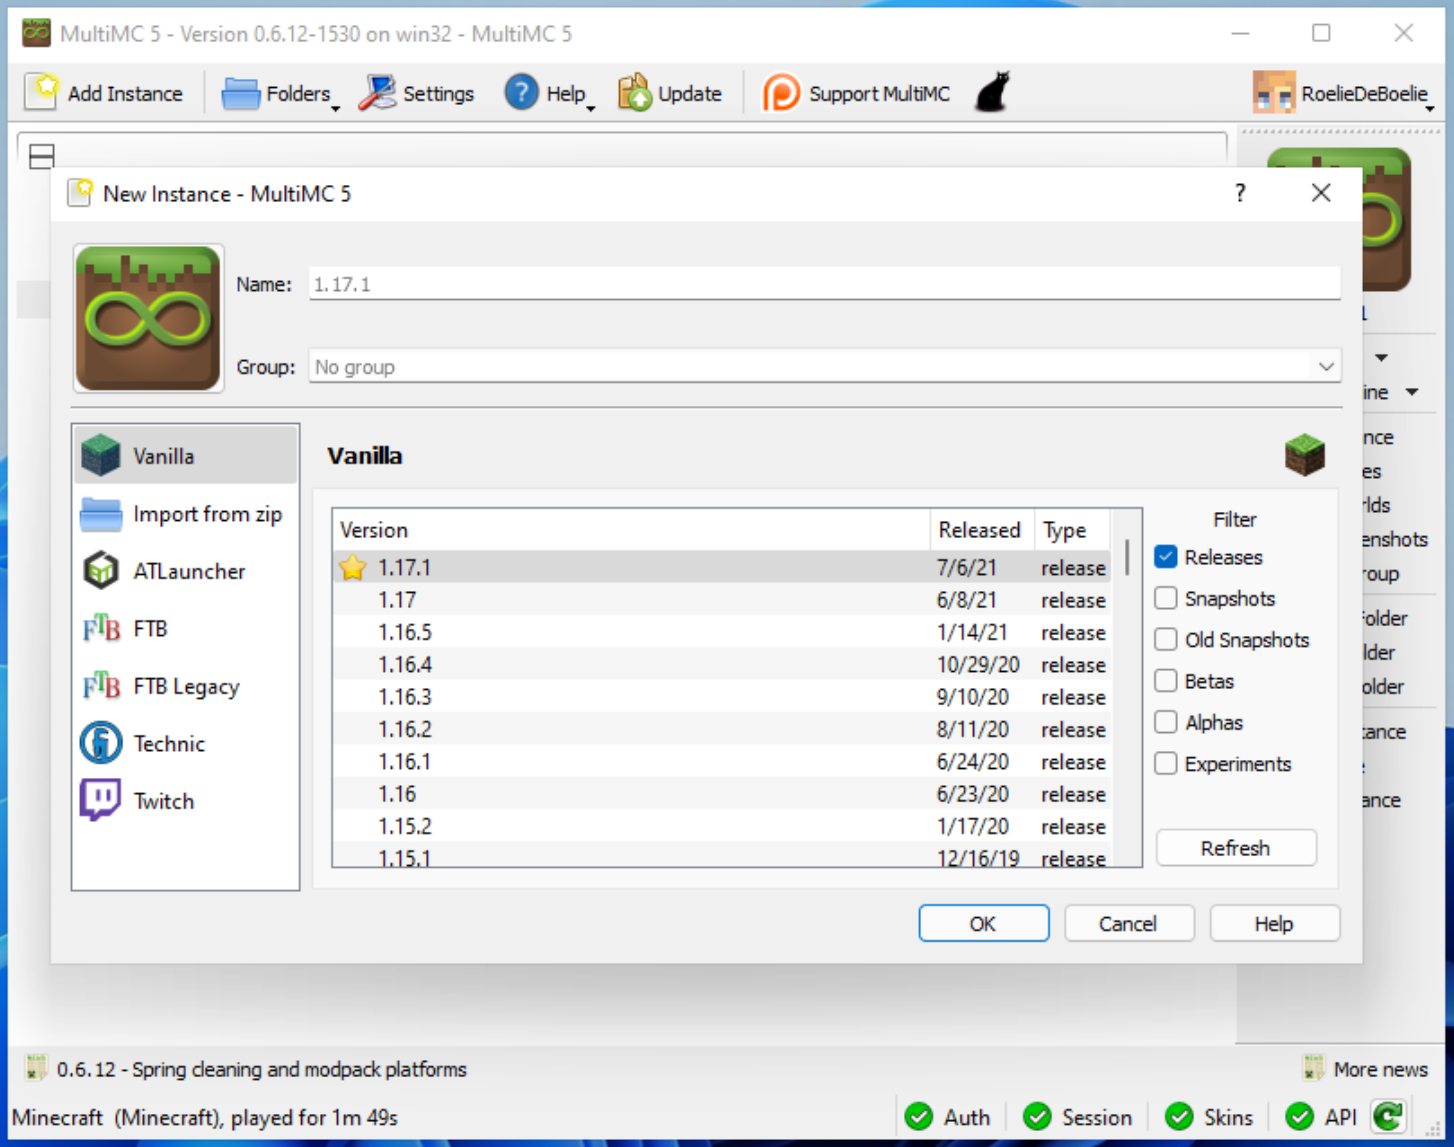
This is the window from which you can add new instances. By default it will have selected the newest available & stable release. In this case, that's 1.17.1.
On the left side you see a selection box with several categories, these are:
- Vanilla: This is where all the basic Minecraft versions released by Mojang are found. When selecting versions from this, you can also change the "filter" on the right, which allows you to also select snapshots, old alpha & beta versions, experiments, ...
- Import from zip: When you (or someone else) has exported an instance to a zip file, you can import it again via this option
- ATLauncher, FTB, Twitch, ...: This option allows you to install modpacks from within MultiMC
For now, we'll just go with the "Vanilla" category, and the default selected version. You can give this instance a special name (it'll choose the version by default) and even assign it to a group (it assigns no group by default). Click OK
Installing Fabric
After clicking OK, the instance will have been added to the main window:
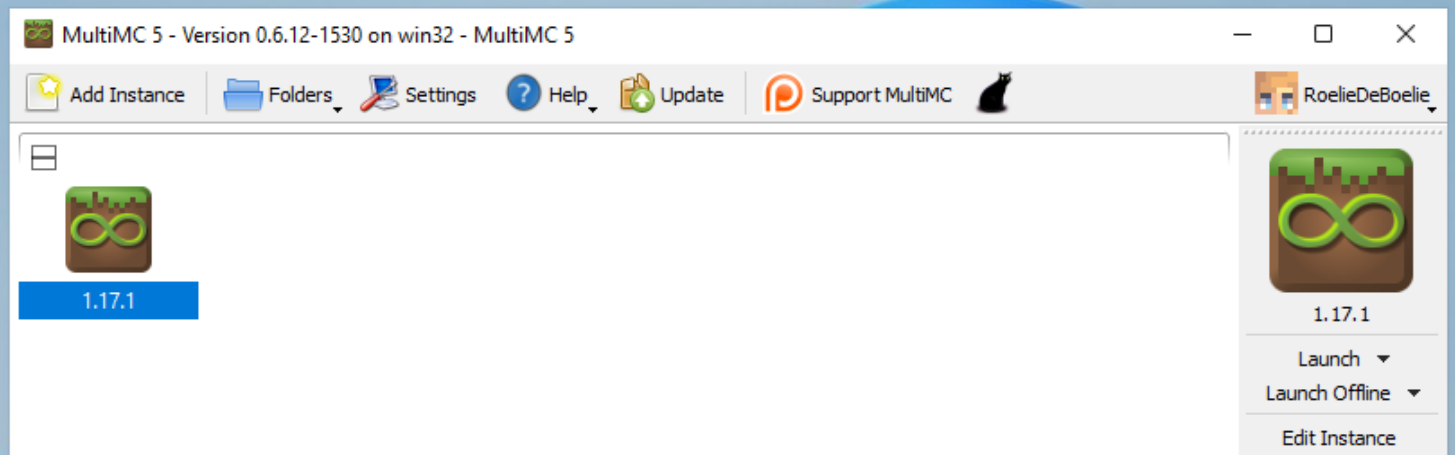
Select it and click the Edit Instance button on the right. Now this window opens up:
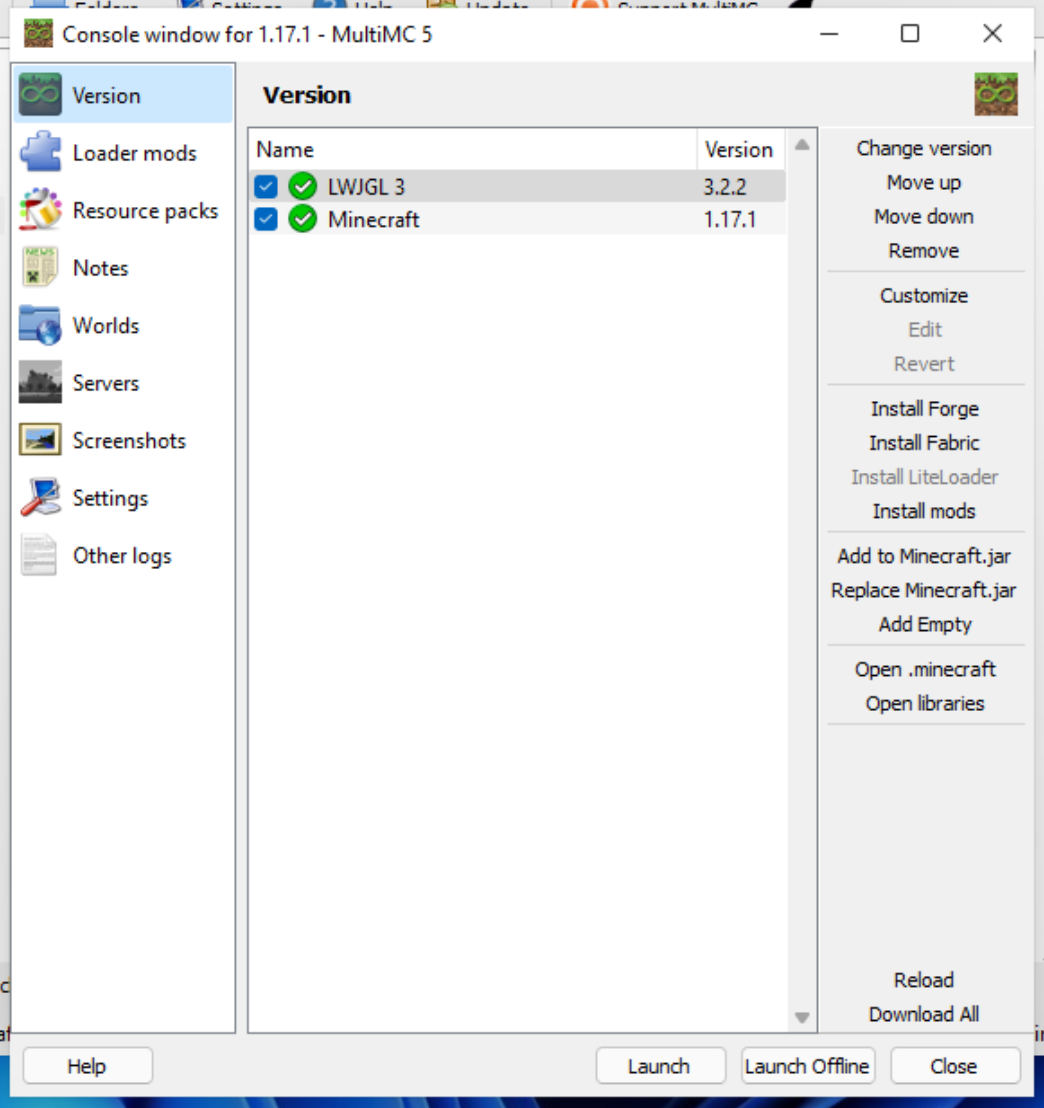
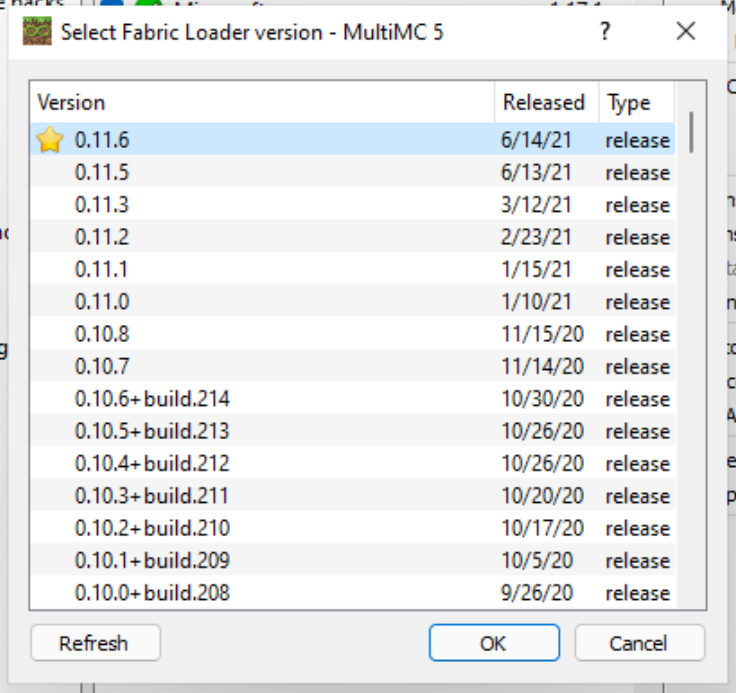
On the right you can see there is an Install Fabric button, click on that to install the Fabric modloader. You'll get a new window with a version selection:
Now you'll see 2 new items have been added to the version screen:
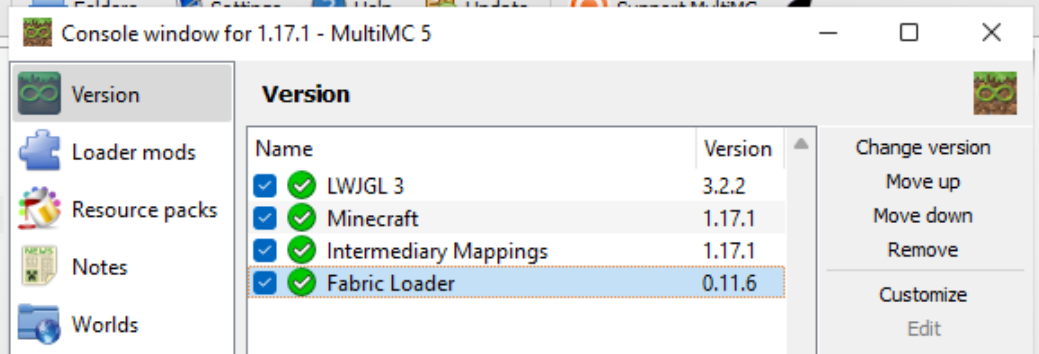
- Intermediary Mappings: This should always be the same version as the "Minecraft" item, so in this case 1.17.1. This is what allows the Fabric loader to make sense of the original Minecraft structure.
- Fabric Loader: This is obviously the actual Fabric loader. This will allow you to run Fabric mods.
You can actually change the version of each item in this screen. Just select it and click the Change Version button on the right. Just make sure to always keep the Minecraft & Intermediary Mappings the same version. Also know that a lot of mods only work with a specific Minecraft version.
Sometimes a mod for, say, 1.17 will also work on 1.17.1, but mods that change a lot of things will need an update.
What's also interesting here, is that the order in which these items are sorted actually matter. But by default, it should be the correct order.
Let's install some mods now!
Install your first mod!
Let's install some Fabric mods! Don't know where to look for them? This page on Curseforge can help you out:
https://www.curseforge.com/minecraft/mc-mods?filter-game-version=2020709689%3A7499&filter-sort=4
You'll find the most popular Fabric mods on there. Although there's 1 mod we should install first, and that is the Fabric API mod.
"What? Didn't I already install Fabric?", I hear you thinking. You installed the Fabric loader in the previous step, but you will still need the Fabric API.
The Fabric API is like the "foundation" other mods can use to write mods. They don't have to use it, but most do because it makes a lot of things a lot easier to program.
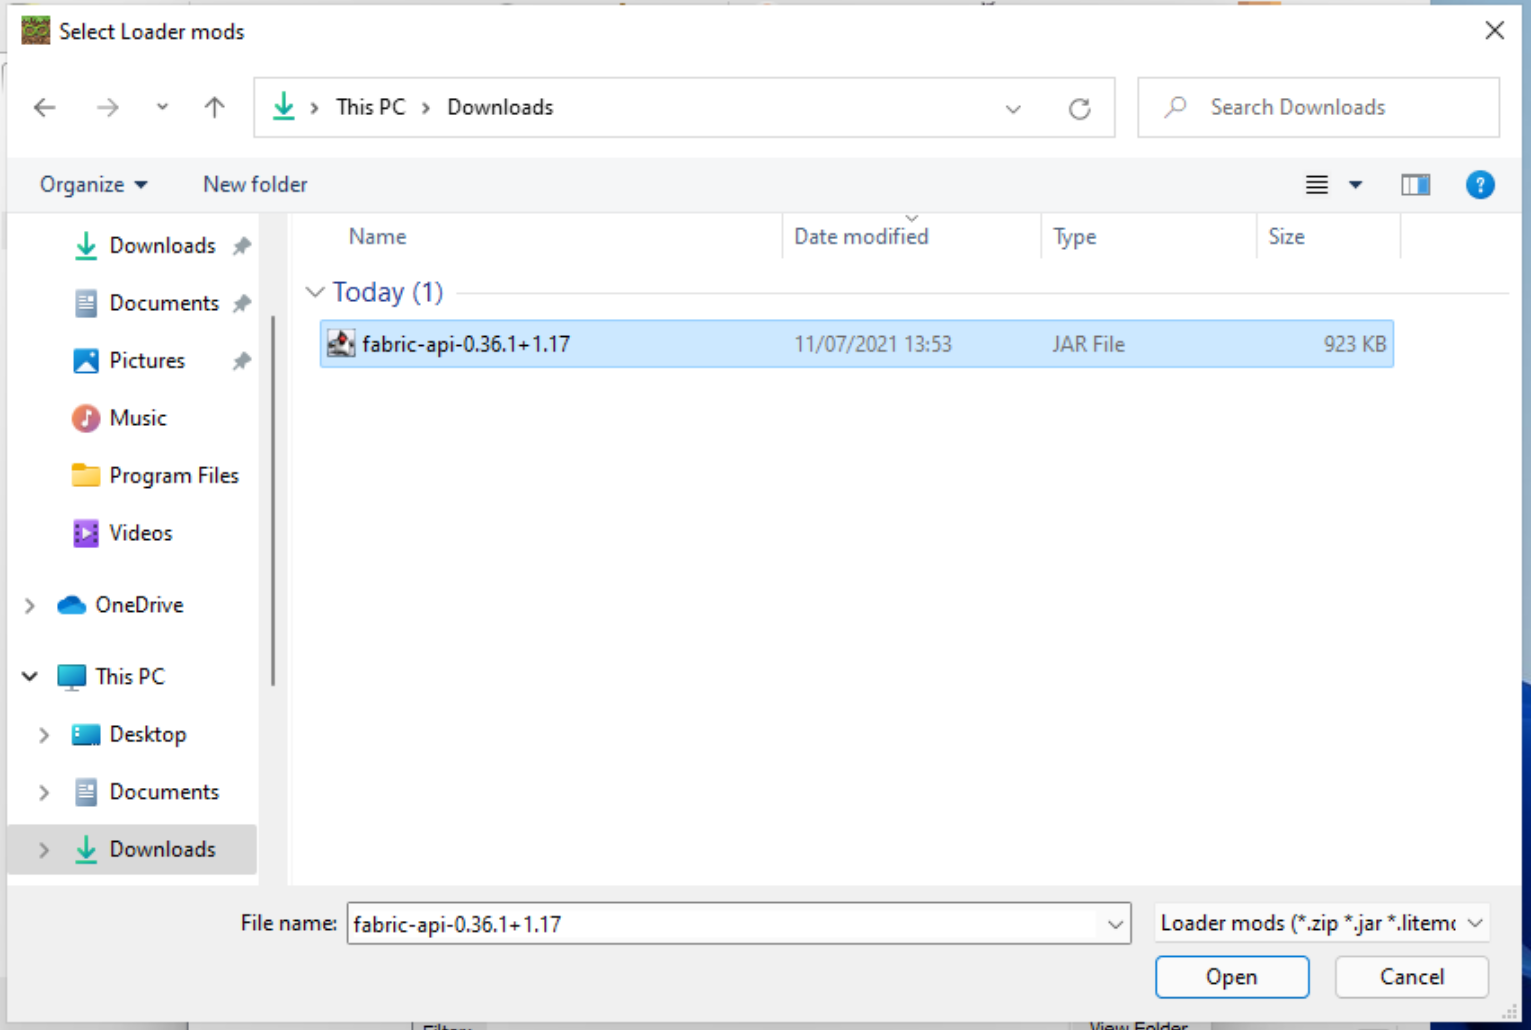
So download the version for your current Minecraft version, it should be a file called something like fabric-api-0.36.1+1.17.jar
Let's go back to the "Edit Instance" window, and select Loader mods on the right:
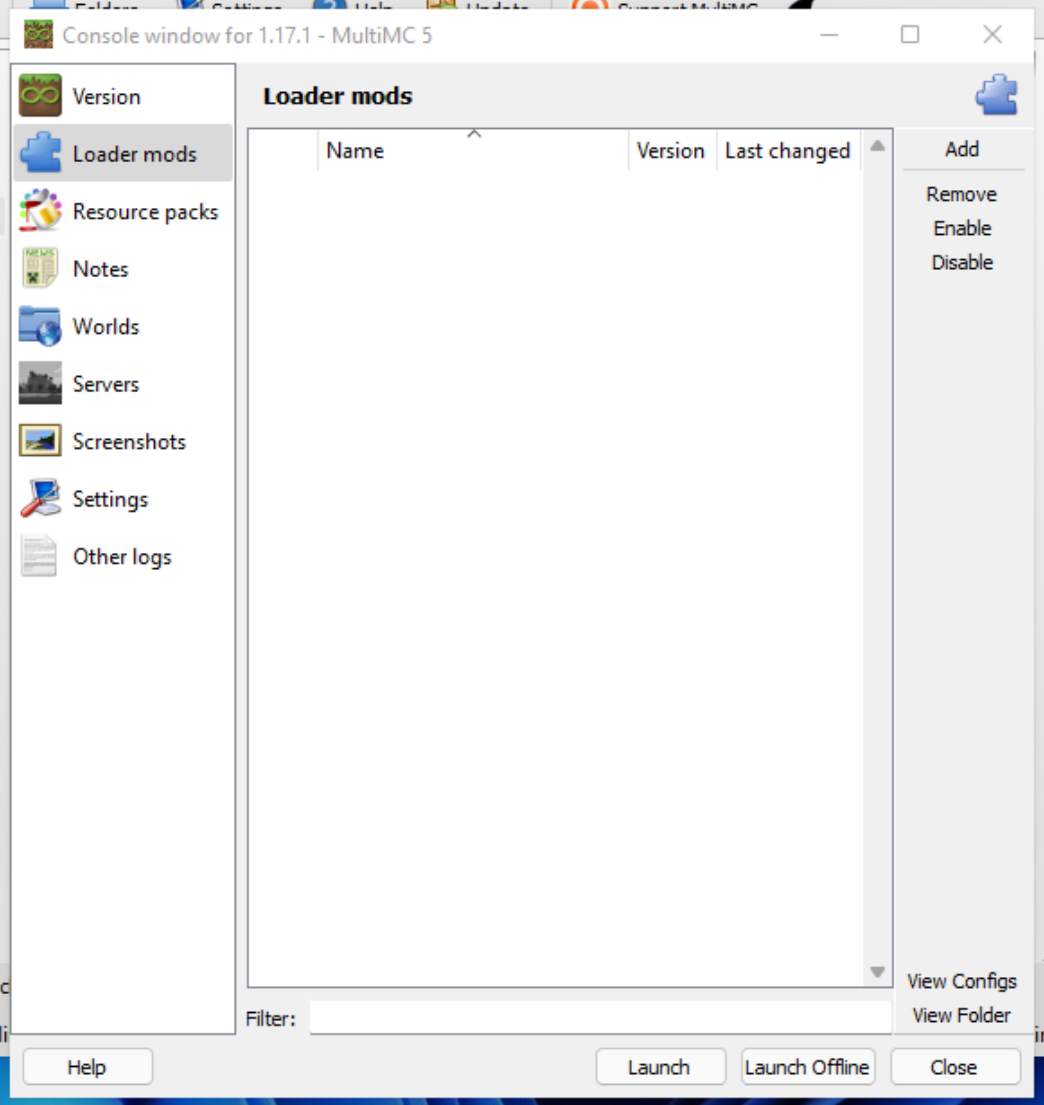
It'll be completely empty here. Click the Add button on the right, and look for the fabric-api jar file we just downloaded:
After finding it and clicking Ok, it'll have been added to the Loader mods screen:
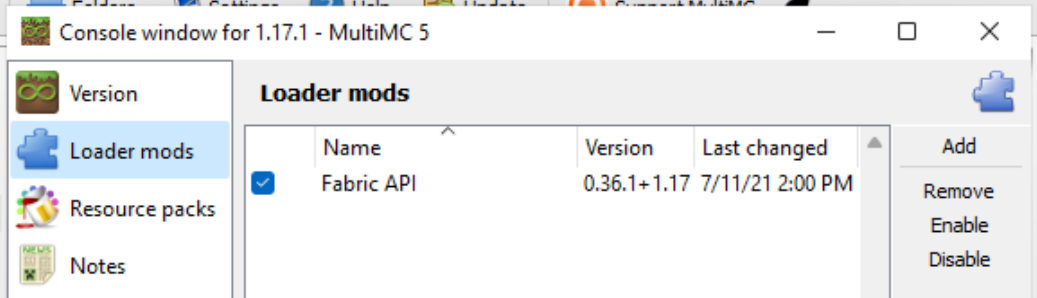
And that's basically it, this is how you can add more mods to it!
Now you can click on the "Launch" button to start Minecraft if you want.
Disabling mods
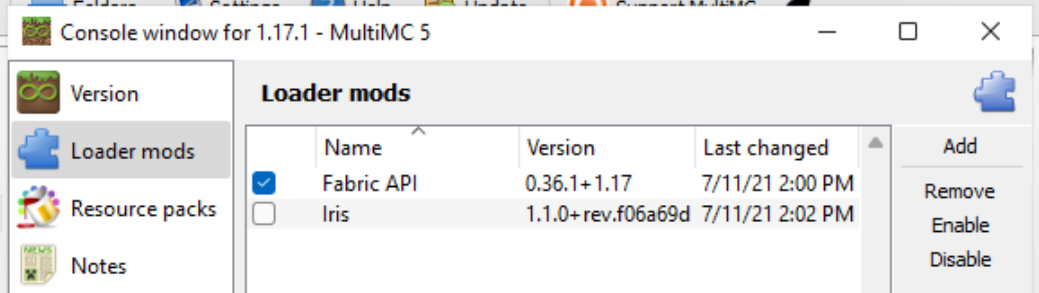
It can happen that you added an incompatible mod, or a mod that is just quite broken. You can either disable or remove that mod from the same window.
In this screenshot you can see I disabled the mod by simply unselecting the checkbox:
If you want to remove it completely, you have to select the mod and click the "Remove" button.
It's as simple as that.
Comments